This post is a companion to the previous GNS3 with Google Compute Engine post. For many of us, an asymmetrical Internet connection usually equates to a much slower upload than download speed. Specifically, in our case, this results in a time-consuming process of uploading GNS3 image files to our remote gns3server VM instance.
- What if we need to recreate the disk attached to our gns3server VM instance?
- Modify the type (i.e., HDD to SSD) or decrease the size of the disk, which again would require us to recreate the disk?
- What if we need to spin up multiple gns3server VM instances for training purposes?
Each situation may require a good amount of unnecessary (re)uploading.
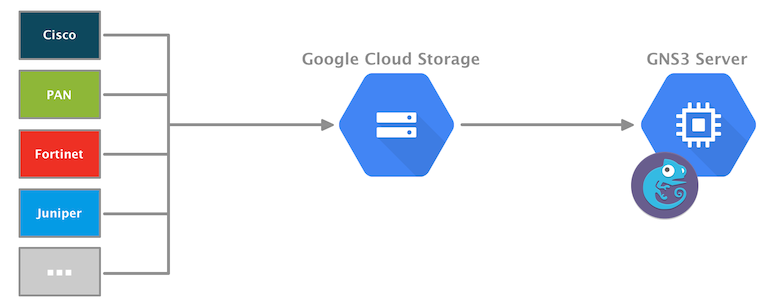
Google Cloud Storage is the solution. We simply upload the GNS3 image files once to a Google Cloud Storage bucket. From that point forward, we can copy the GNS3 image files across the Google Cloud private network at blazingly fast speeds.
5 GB of regional Google Cloud Storage per month (US Regions only - excluding North Virginia) is included with the GCP Free Tier .
Steps
- Create a Google Cloud Storage bucket.
Google Cloud Storage has two primary concepts: buckets and objects. The bucket we create in this step will serve as the container for our GNS3 image files (objects).
- Go to the Storage page
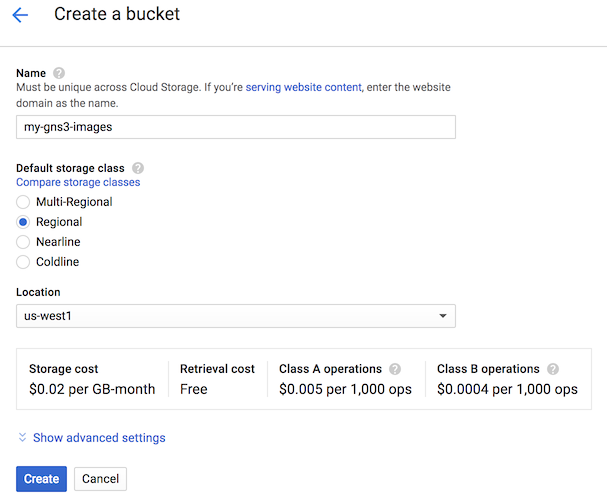
- Click the CREATE BUCKET button
- Enter a globally unique value for Name
- Select Regional for Default storage class
- Select the same region your gns3server VM instance is located from the Location drop-down menu
- Click the Create button

- Upload the GNS3 image file(s) to the Google Cloud Storage bucket.
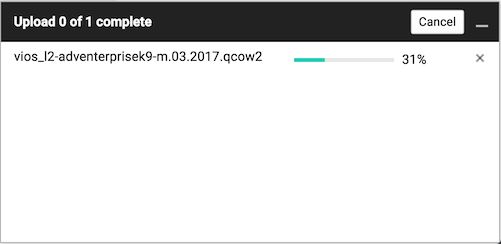
- On the Bucket details page for our newly created bucket, click either the Upload files or Upload folder button
- Select the GNS3 image files or the folder containing the files
- Click the Open (or Upload for folder option) button

- Connect to your gns3server VM instance.
- Go to the VM Instances page
- Locate your gns3server VM instance in the list
- Click SSH to establish a connection

- Run an elevated shell.
sudo -i
- Change to the
imagesdirectory.
cd /opt/gns3/GNS3/images
- List the Google Cloud Storage bucket(s).
gsutil ls
output:
gs://my-gns3-images/
- List the GNS3 image files (objects) that we previously uploaded to our GCS bucket.
gsutil du -ch gs://my-gns3-images
output:
195.38 MiB  gs://my-gns3-images/asav992.qcow2
48.13 MiB   gs://my-gns3-images/c7200-adventerprisek9-mz.153-3.XB12.bin
51.77 MiB   gs://my-gns3-images/c7200-adventerprisek9-mz.155-2.XB.bin
175.9 MiB   gs://my-gns3-images/i86bi_linux-adventerprisek9-ms.157-3.M.bin
100.78 MiB  gs://my-gns3-images/i86bi_linux_l2-ipbasek9-ms.high_iron_aug9_2017b.bin
940.13 MiB  gs://my-gns3-images/nxosv-final.7.0.3.I7.4.qcow2
1.24 GiB    gs://my-gns3-images/nxosv-final.9.2.1.qcow2
122.5 MiB   gs://my-gns3-images/vios-adventerprisek9-m.vmdk.SPA.156-2.T.vmdk
39.25 MiB   gs://my-gns3-images/vios_l2-adventerprisek9-m.03.2017.qcow2
1.13 GiB    gs://my-gns3-images/xrv9k-fullk9-x-6.5.1.qcow2
4 GiB       total
- Copy all GNS3 image files from the GCS bucket to the local directory.
gsutil -m cp gs://my-gns3-images/* .
- Uncompress Cisco IOS image files if using Dynamips.
apt update && apt -y install unzip
ls -1 c7200*
output:
c7200-adventerprisek9-mz.153-3.XB12.bin
c7200-adventerprisek9-mz.155-2.XB.bin
for f in c7200*; do unzip -p "$f" > "${f%.bin}.image"; rm "$f"; done
ls -1 c7200*
output:
c7200-adventerprisek9-mz.153-3.XB12.image
c7200-adventerprisek9-mz.155-2.XB.image
- Change the owner of the GNS3 image files to the
gns3user and group.
chown gns3:gns3 *.{bin,image,qcow2,vmdk}
- If using IOL, set the binary files as executable.
ls -lh i86bi_linux*
output:
-rw-r--r-- 1 gns3 gns3 176M Aug 26 23:12 i86bi_linux-adventerprisek9-ms.157-3.M.bin
-rw-r--r-- 1 gns3 gns3 101M Aug 26 23:12 i86bi_linux_l2-ipbasek9-ms.high_iron_aug9_2017b.bin
chmod -v u+x i86bi_linux*
output:
mode of 'i86bi_linux-adventerprisek9-ms.157-3.M.bin' changed from 0644 (rw-r--r--) to 0744 (rwxr--r--)
mode of 'i86bi_linux_l2-ipbasek9-ms.high_iron_aug9_2017b.bin' changed from 0644 (rw-r--r--) to 0744 (rwxr--r--)
- Exit the shell.
exit
exit
GNS3 client
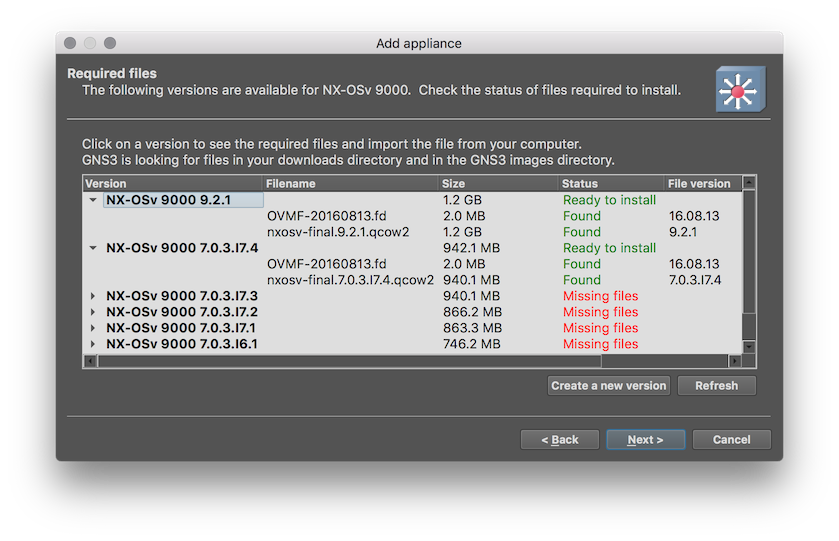
On our local GNS3 client, we can perform the same steps for the appliance import process just as we normally would. The difference is GNS3 will now find the existing images located in the remote gns3server images directory, so it will skip the upload operation.
