A lab server is a cornerstone of learning and experimentation. Whether you’re spinning up a simple virtual networking lab or deploying a complex, multi-cluster Kubernetes topology via Vagrant, a dedicated server provides the power and flexibility that local environments often lack.
You might wonder why we’re choosing Arch for this build. Arch Linux is prized for its minimal footprint, ensuring that your computing resources are dedicated to your workloads rather than the operating system. Furthermore, it offers the distinct advantage of streamlined access to the latest software, keeping your lab on the cutting edge without the bloat found in other distributions.
This guide provides an opinionated, step-by-step walkthrough for installing and configuring a headless, bare-metal lab server. By opting for a headless setup (no graphical user interface), we maximize performance and stability.
The entire process can be completed in under an hour. Once finished, your server will be optimized and ready for the following tools:
- Docker - For containerized applications and services.
- Vagrant (with vagrant-libvirt ) - For automated virtual machine management.
- Containerlab - For orchestrating container-based networking labs.
- netlab - For efficient network topology virtualization.
Base
-
Disable Secure Boot in the BIOS settings.
-
Start the computer with a bootable USB flash drive provisioned with the Arch Linux ISO.

- Run archinstall at the prompt.
archinstall
- Set the configuration.
For instance, I utilize the following configuration based on my specific requirements:
| Option | Value(s) |
|---|---|
| Archinstall language | English (100%) |
| Locales |
Keyboard layout: us Locale language: en_US.UTF-8 Locale encoding: UTF-8 |
| Mirrors and repositories | United States |
| Disk configuration |
Use a best-effort default partition layout Filesystem: xfs Would you like to create a separate partition for /home?: No |
| Swap | Swap on zram: Enabled |
| Bootloader | Systemd-boot |
| Unified kernel images | Disabled |
| Hostname | arch |
| Authentication |
Root password: ***** User account: username: marc password: ***** sudo: True groups: [] |
| Profile | Profiles: Minimal |
| Applications | |
| Kernels | linux |
| Network configuration |
Manual configuration: iface: enp191s0 ip: 192.168.137.52/24 dhcp: False gateway: 192.168.137.1 dns: 192.168.137.1 |
| Additional packages |
less openssh vim |
| Timezone | US/Pacific |
| Automatic time sync (NTP) | NTP: Enabled |
-
Select
Install. -
Remove the bootable USB flash drive and select
Reboot systemafter installation is complete. -
Log in with the user account.
-
Verify essential packages are installed.
pacman -Qqe
output:
base
base-devel
efibootmgr
intel-ucode
less
linux
linux-firmware
openssh
vim
xfsprogs
zram-generator
amd-ucodefor computers with an AMD CPU.
- Enable and start the OpenSSH daemon.
sudo systemctl enable --now sshd
- Verify the OpenSSH server process (
sshd) is running and listening on port 22.
sudo ss -ntlp sport = :22
- (Optional) Connect remotely for the remaining steps.
For my example, I establish a connection to the 192.168.137.52 IP address with the user account marc as defined in the archinstall step.
ssh [email protected]
- Install the
zshpackage.
sudo pacman -S zsh
- Run Z shell (Zsh).
zsh
- Create an empty Zsh configuration file.
This is the Z Shell configuration function for new users,
zsh-newuser-install.
You are seeing this message because you have no zsh startup files
(the files .zshenv, .zprofile, .zshrc, .zlogin in the directory
~).  This function can help you with a few settings that should
make your use of the shell easier.

You can:

(q)  Quit and do nothing.  The function will be run again next time.

(0)  Exit, creating the file ~/.zshrc containing just a comment.
     That will prevent this function being run again.

(1)  Continue to the main menu.

--- Type one of the keys in parentheses ---
Enter 0.
- Exit out of Zsh back to the default Bash shell.
exit
- Set the default shell to Zsh.
chsh -s /usr/bin/zsh
-
Log out and back in for the shell change to take effect.
-
Install and configure Zsh for Humans .
sh -c "$(curl -fsSL https://raw.githubusercontent.com/romkatv/zsh4humans/v5/install)"
Answer each question to customize Zsh to your liking.
- Install Python (with tooling) and Go.
sudo pacman -S python uv go
- Set optimized compiler options for Makepkg .
sudo vim /etc/makepkg.conf
Modify the following compiler flags:
march=x86-64→march=native- Remove
mtune=generic O2→O3
#########################################################################
# ARCHITECTURE, COMPILE FLAGS
#########################################################################
#
CARCH="x86_64"
CHOST="x86_64-pc-linux-gnu"

#-- Compiler and Linker Flags
#CPPFLAGS=""
CFLAGS="-march=native -O3 -pipe -fno-plt -fexceptions \
        -Wp,-D_FORTIFY_SOURCE=3 -Wformat -Werror=format-security \
        -fstack-clash-protection -fcf-protection \
        -fno-omit-frame-pointer -mno-omit-leaf-frame-pointer"
CXXFLAGS="$CFLAGS -Wp,-D_GLIBCXX_ASSERTIONS"
LDFLAGS="-Wl,-O1 -Wl,--sort-common -Wl,--as-needed -Wl,-z,relro -Wl,-z,now \
         -Wl,-z,pack-relative-relocs"
LTOFLAGS="-flto=auto"
#-- Make Flags: change this for DistCC/SMP systems
#MAKEFLAGS="-j2"
#-- Debugging flags
DEBUG_CFLAGS="-g"
DEBUG_CXXFLAGS="$DEBUG_CFLAGS"- Install an AUR helper .
Create the src directory and change to it.
mkdir -p ~/src && cd $_
I prefer yay , so I install it with the following chain of commands:
sudo pacman -S --needed git base-devel && git clone https://aur.archlinux.org/yay.git && cd yay && makepkg -sci
QEMU/KVM
- Install the
qemu-basepackage.
yay -S qemu-base
- Enable Kernel Same-page Merging (KSM ).
Set for runtime.
echo 1 | sudo tee /sys/kernel/mm/ksm/run
Make the configuration persistent.
printf 'w /sys/kernel/mm/ksm/run - - - - 1\n' | sudo tee /etc/tmpfiles.d/ksm.conf
Example: Juniper vJunos-switches on a host with KSM enabled.
- Modify the KVM halt polling interval .
This setting reduces idle CPU usage for specific virtual Cisco devices (e.g., Catalyst 8000V and CSR 1000v).
Get the default value.
cat /sys/module/kvm/parameters/halt_poll_ns
output:
200000
Set for runtime.
echo 0 | sudo tee /sys/module/kvm/parameters/halt_poll_ns
Make the configuration persistent.
printf 'options kvm halt_poll_ns=0\n' | sudo tee /etc/modprobe.d/qemu-kvm.conf
- Verify KVM nested virtualization is enabled.
For computers with an Intel CPU:
cat /sys/module/kvm_intel/parameters/nested
output:
Y
For computers with an AMD CPU:
cat /sys/module/kvm_amd/parameters/nested
output:
1
Libvirt
- Install packages.
yay -S dmidecode dnsmasq libvirt openbsd-netcat
- Add the
LIBVIRT_DEFAULT_URIshell variable to the Zsh configuration file.
vim ~/.zshrc
|
|
- Set the Libvirt firewall backend to
iptables.
sudo vim /etc/libvirt/network.conf
# Master configuration file for the network driver.
# All settings described here are optional - if omitted, sensible
# defaults are used.

# firewall_backend:
#
#   determines which subsystem to use to setup firewall packet
#   filtering rules for virtual networks.
#
#   Supported settings:
#
#     iptables - use iptables commands to construct the firewall
#     nftables - use nft commands to construct the firewall
#
#   If firewall_backend isn't configured, libvirt will choose the
#   first available backend from the following list:
#
#     [nftables, iptables]
#
#   If no backend is available on the host, then the network driver
#   will fail to start, and an error will be logged.
#
#   (NB: switching from one backend to another while there are active
#   virtual networks *is* supported. The change will take place the
#   next time that libvirtd/virtnetworkd is restarted - all existing
#   virtual networks will have their old firewalls removed, and then
#   reloaded using the new backend.)
#
firewall_backend = "iptables"- Use the systemd DNS stub file for name resolution.
sudo ln -sf /run/systemd/resolve/stub-resolv.conf /etc/resolv.conf
- Enable Libvirt name resolution.
sudo vim /etc/nsswitch.conf
Add libvirt and libvirt_guest to the beginning of the query order for the hosts database.
# Name Service Switch configuration file.
# See nsswitch.conf(5) for details.

passwd: files systemd
group: files [SUCCESS=merge] systemd
shadow: files systemd
gshadow: files systemd

publickey: files

hosts: libvirt libvirt_guest mymachines resolve [!UNAVAIL=return] files myhostname dns
networks: files

protocols: files
services: files
ethers: files
rpc: files

netgroup: files- Add yourself to the
libvirtgroup.
sudo gpasswd -a $USER libvirt
-
Log out and back in for the new group membership to take effect.
-
Verify the group membership.
id -Gn | cut -d' ' -f2-
output:
libvirt wheel
- Enable and start the
libvirtdservice.
sudo systemctl enable --now libvirtd.service
- Validate the QEMU/KVM stack.
virt-host-validate qemu
Vagrant
- Install the
vagrantpackage.
yay -S vagrant
-
Verify the Vagrant installation.
vagrant --version && vagrant plugin list
Containerlab
- Install Docker (with tooling) and the Containerlab package.
yay -S docker docker-compose docker-buildx containerlab
- Add yourself to the
dockergroup.
sudo gpasswd -a $USER docker
-
Log out and back in for the new group membership to take effect.
-
Verify the group membership.
id -Gn | cut -d' ' -f2-
output:
docker libvirt wheel
- Enable and start the
dockerservice.
sudo systemctl enable --now docker.service
- Verify the status of Docker.
docker info
- (Optional) Test the installation with
hello-world.
docker run --rm hello-world
- Create the
clabalias.
vim ~/.zshrc
Add the alias.
|
|
- Enable sudo-less operation .
Use the setuid
flag for the containerlab binary file.
This may need to be (re)set after every version upgrade.
sudo chmod u+s $(which containerlab)
Create the clab_admins system group.
sudo groupadd -r clab_admins
Add yourself to the clab_admins group.
sudo gpasswd -a $USER clab_admins
-
Log out and back in for the changes to take effect.
-
Verify the group membership.
id -Gn | cut -d' ' -f2-
output:
clab_admins docker libvirt wheel
- Verify the
clabalias.
clab version
Netlab
- Install the
sshpasspackage.
yay -S sshpass
- Disable the libvirt probe .
printf 'providers.libvirt.probe: []\n' > ~/.netlab.yml
Netlab supports both Vagrant and Containerlab. The following is a quick start for an OSPF lab:
a. Add the Cisco Catalyst 8000V Vagrant box .
The additional Arch Linux packages required for building the Vagrant box:
yay -S inetutils expect unzip pigz
b. Define the Python version and packages in a pyproject.toml file.
[project]
name = "ospf-basic"
version = "0.0.1"
requires-python = "==3.12.*"
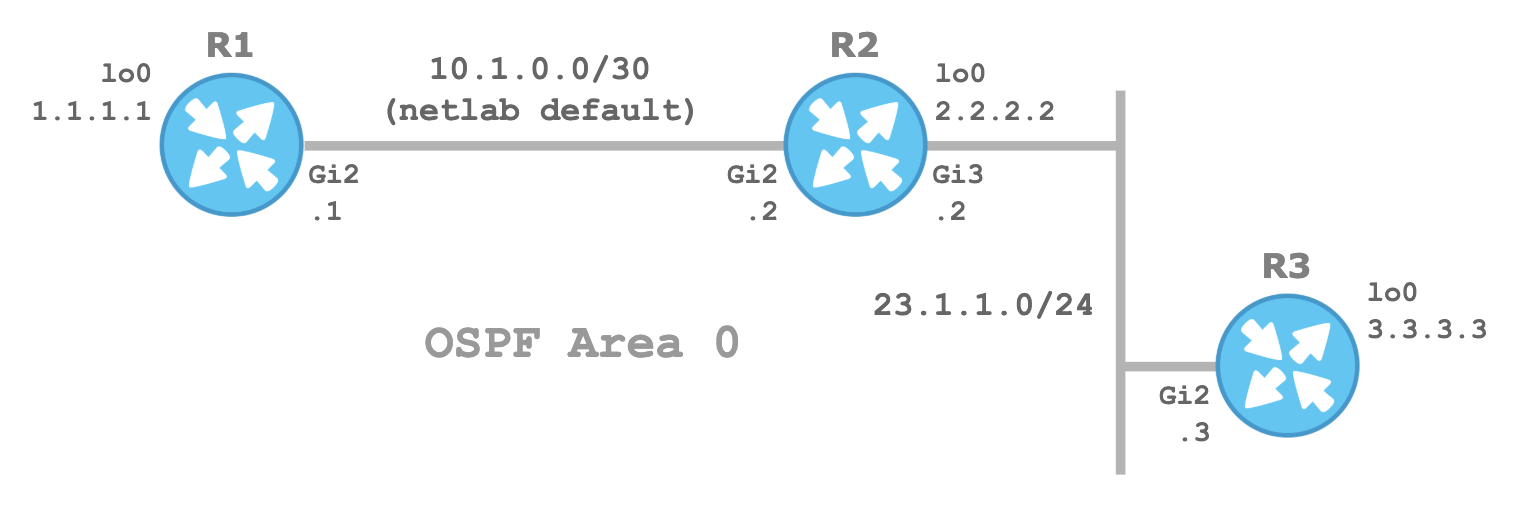
dependencies = ["networklab", "ansible<=11.10.0", "ansible-pylibssh"]c. Describe the high-level topology in a topology.yml file.
---
provider: libvirt
defaults:
  device: cat8000v

module: [ospf]

nodes:
  r1:
    loopback:
      ipv4: 1.1.1.1/32
  r2:
    loopback:
      ipv4: 2.2.2.2/32
  r3:
    loopback:
      ipv4: 3.3.3.3/32

links:
  - r1-r2
  - r2:
    r3:
    type: lan
    prefix: 23.1.1.0/24
    ospf:
      network_type: broadcast
d. Create the Python project’s environment.
uv sync
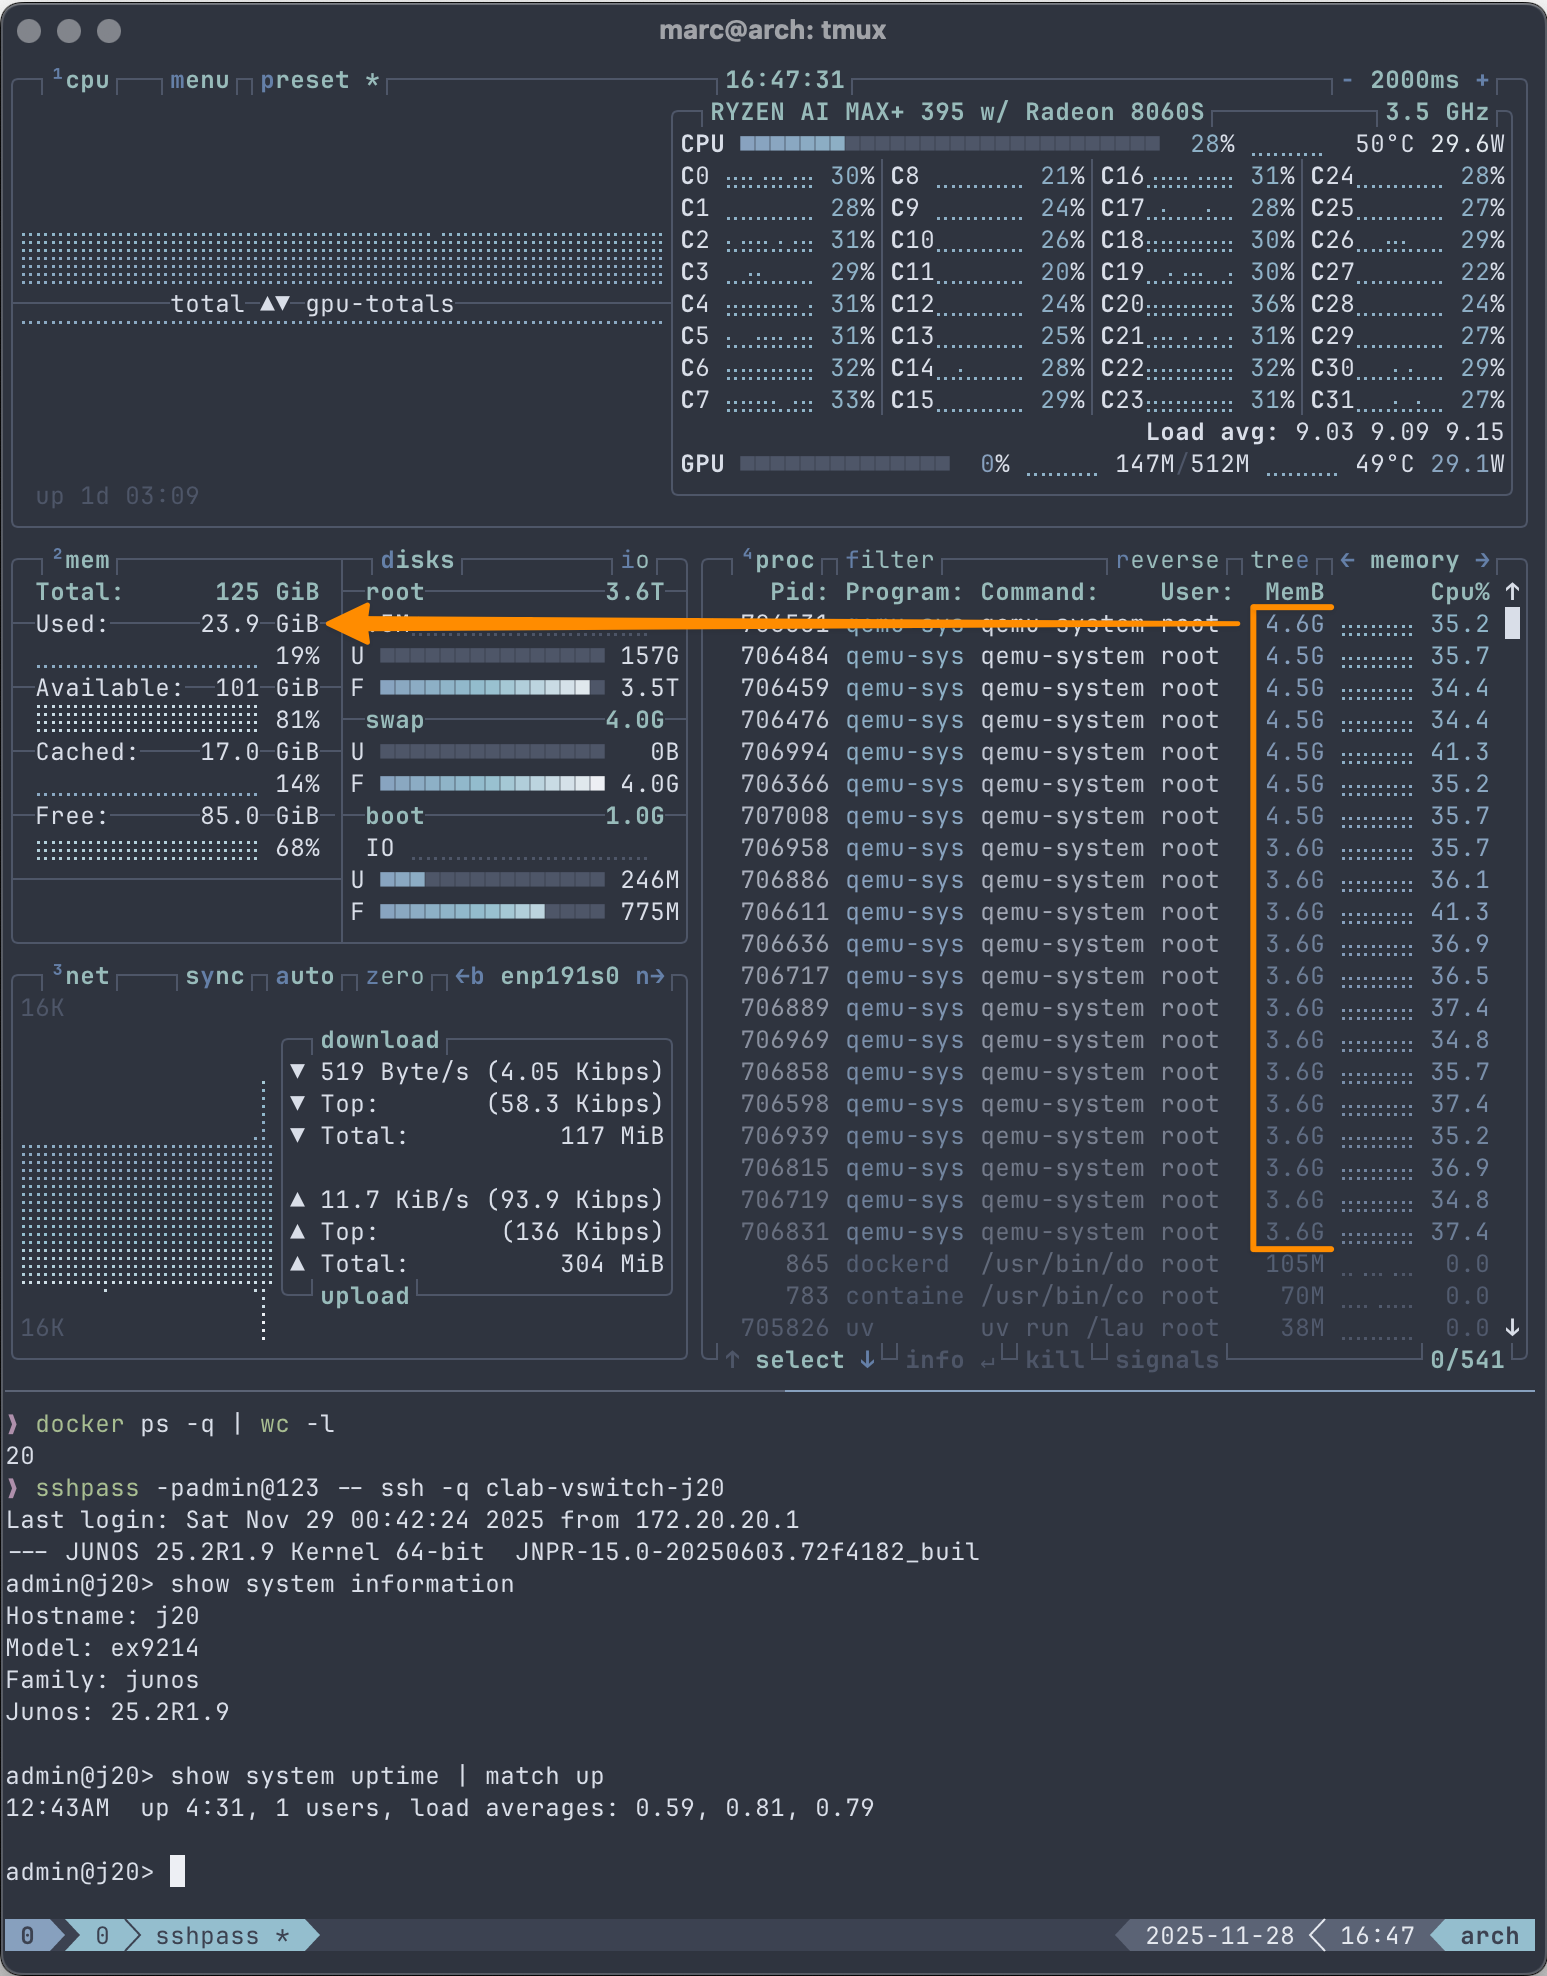
e. Start the lab and deploy the initial device configurations.
uv run netlab up
Bonus
- Disable the password prompt for sudo.
sudo sed -i 's/ALL=(ALL)/& NOPASSWD:/' /etc/sudoers.d/00_${USER}
- Verify the modification.
sudo -ll
output:
Matching Defaults entries for marc on arch:
    secure_path=/usr/local/sbin\:/usr/local/bin\:/usr/bin

Runas and Command-specific defaults for marc:
    Defaults!/usr/bin/visudo env_keep+="SUDO_EDITOR EDITOR VISUAL"

User marc may run the following commands on arch:

Sudoers entry: /etc/sudoers.d/00_marc
    RunAsUsers: ALL
    Options: !authenticate
    Commands:
        ALL