
Google Cloud is one of the big three public cloud computing providers for services such as virtual machines (VMs), containers, server-less computing, and machine learning. Google Cloud is a large platform, but we’re focused solely on the Infrastructure as a Service (IaaS) resources in this guide.
The GNS3 architecture is comprised of three primary components: User Interface (UI), Controller, and the (Compute) Server. The Server is the component that puts a strain on computer hardware resources. The more routers, switches, firewalls, and servers we add to our GNS3 topologies, the more CPU, RAM, and data storage we require. We usually come to a point where the hardware requirements of our GNS3 labs may exceed what our laptops and desktops can deliver.
Public cloud providers and GNS3 complement each other. We require ever-increasing computing resources to run our labs, and they rent it out by the minute (or even second).
Highlights
KVM nested virtualization for Google Compute Engine
Google Compute Engine currently supports nested virtualization . We were previously limited to Dynamips, IOL, VPCS, Docker, and QEMU (without hardware-assisted virtualization) for running GNS3 devices within the confines of a GCE VM instance. QEMU with KVM was the missing piece. Not anymore. Resource-hungry network virtual appliances like the PAN VM, Cisco Nexus 9000v, and even the monstrous Cisco IOS XRv 9000 can now be run in our GNS3 projects with Google Compute Engine.
Deployment streamlined with Ansible
After setting a few variables, we can perform an Ansible playbook run that automates over 70 tasks in about 10 minutes.
Simple and secure WireGuard VPN connection to remote gns3server
WireGuard is a simple yet fast and modern VPN that utilizes state-of-the-art cryptography. WireGuard aims to be as easy to configure and deploy as SSH. A VPN connection is made by exchanging public keys – precisely like exchanging SSH keys – and WireGuard transparently handles the rest.

Dynamic DNS (DDNS)
Our VM instance uses an ephemeral external IP address. An ephemeral external IP address remains attached to an instance only until it’s stopped and restarted, or the instance is terminated. When a stopped instance is started again, a new ephemeral external IP address is assigned to the instance.
A static external IP address would be preferable, but Google charges us when the address is reserved and not in use. This includes when the VM instance is stopped. Instead of modifying the WireGuard client configuration every time the instance is started, our method is to link the ephemeral external IP address with Dynamic DNS .
Steps
1. Create a domain with Duck DNS.
Navigate your web browser to Duck DNS , and use one of the OAuth providers to create an account. We need two values from Duck DNS: the token and domain. A token is automatically generated, but you need to add a domain (subdomain). The domain is the unique identifier for our specific VM instance on the public Internet.
2. Create a WireGuard tunnel for the remote GNS3 server connection.
- Download and install WireGuard .
- Open the WireGuard application.
- Press the ⌃ + N key combination to add an empty tunnel.
- Enter
gns3serverin the Name field. - Add the following content starting at the line below the PrivateKey attribute:
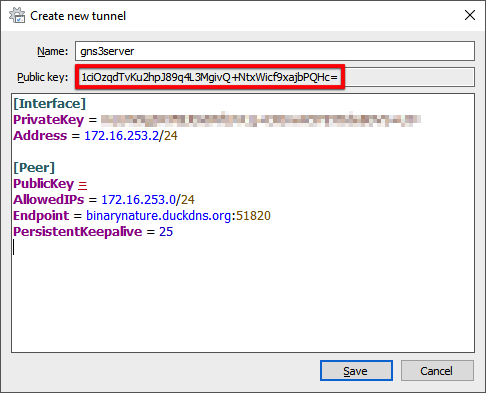
Address = 172.16.253.2/24

[Peer]
PublicKey =
AllowedIPs = 172.16.253.0/24
Endpoint = <subdomain>.duckdns.org:51820
PersistentKeepalive = 25
The Endpoint value is the Duck DNS domain you just created with the WireGuard port number appended. Don’t save yet because we still require the public key value from the peer. We will come back to complete the configuration in a later step.
Take note of your Public key value right below the Name property. An Ansible variable (wireguard_peer_pubkey) will require this in a later step.
3. Create a new GCP project.
- Go to the Manage resources page.
- Click the CREATE PROJECT button.
- Enter a value for Project Name.
- Click the CREATE button.
4. Enable the Google Compute Engine API.
The Google Compute Engine API can be enabled by simply navigating to the VM Instances page.
- Go to the VM Instances page.
- Wait for the Compute Engine is getting ready. This may take a minute or more. message to clear.
You may need to click the bell icon (Notifications) located in the upper-right corner to display the current status if a couple of minutes has passed without a page refresh.
5. Activate the Google Cloud Shell.
The next several steps utilize the Google Cloud Shell command-line interface.

6. Install Ansible.
The Google Cloud Shell instance provides a selection of tools and utilities, but Ansible is not one of them. This omission is simple to resolve.
Install Ansible with the Python package manager.
pip3 install --user --upgrade ansible
7. Prepend the PATH variable with the $HOME/.local/bin directory.
We need to instruct the bash shell to search for the Ansible executables in the $HOME/.local/bin directory. The directory is not included in the PATH variable by default.
Open the shell .profile file with a text editor.
nano $HOME/.profile
Add the code block highlighted at the end of the file.
# ~/.profile: executed by the command interpreter for login shells.
# This file is not read by bash(1), if ~/.bash_profile or ~/.bash_login
# exists.
# see /usr/share/doc/bash/examples/startup-files for examples.
# the files are located in the bash-doc package.

# the default umask is set in /etc/profile; for setting the umask
# for ssh logins, install and configure the libpam-umask package.
#umask 022

# if running bash
if [ -n "$BASH_VERSION" ]; then
    # include .bashrc if it exists
    if [ -f "$HOME/.bashrc" ]; then
        . "$HOME/.bashrc"
    fi
fi

# set PATH so it includes user's private bin if it exists
if [ -d "$HOME/bin" ] ; then
    PATH="$HOME/bin:$PATH"
fi

if [ -d "$HOME/.local/bin" ] ; then
    PATH="$HOME/.local/bin:$PATH"
fi- ⌃ +
o(Save) the file. - ⏎ to confirm.
- ⌃ +
x(exit) thenanotext editor.
Verify the configuration change.
tail -n 3 $HOME/.profile
output:
if [ -d "$HOME/.local/bin" ] ; then
    PATH="$HOME/.local/bin:$PATH"
fi
8. Exit the Google Cloud Shell.
The modification to the PATH variable won’t take effect until we reopen the Google Cloud Shell.
exit
9. Reactivate the Google Cloud Shell.

10. Verify the PATH variable is updated.
ansible --version
11. Create an Ansible playbooks directory and change to it.
mkdir -p $HOME/playbooks && cd $_
12. Clone the gcp-gns3server repository from GitHub and change to the new directory.
git clone https://github.com/mweisel/gcp-gns3server.git && cd gcp-gns3server
13. Set the variables for the deployment.
- Click the Launch Editor icon on the Google Cloud Shell toolbar. It splits the web browser window with the text editor located at the top and the terminal at the bottom.

Click the
vars.ymlfile to edit. It’s a YAML file, so I suggest the YAML - Quick Guide if you’re not familiar with the syntax.At the top of the file, we have the PROJECT AND ZONE section. The
gcp_project_idvariable value is your Project ID.
gcloud config get-value project
The gcp_zone variable value depends on your location and if the zone supports either the Intel Skylake or Haswell CPU platforms. Skylake or Haswell is a requirement for GCE nested virtualization.
- Use GCP ping to find the nearest region/zone
- Does the nearest region/zone support either Skylake or Haswell ?
For example, I am located in the Pacific Northwest of the United States, so my nearest region is us-west1. I have a choice of us-west1-a, us-west1-b, or us-west1-c for zones in the region. Does the zone I select support either Intel Skylake or Haswell?
gcloud compute zones describe us-west1-b --format="value(availableCpuPlatforms)"
output:
Intel Skylake;Intel Broadwell;Intel Haswell;Intel Ivy Bridge;Intel Sandy Bridge
Looks good, so I enter the values with the text editor.
---
### PROJECT and ZONE ###

# https://console.cloud.google.com/iam-admin/settings/project
# `gcloud config get-value project`
gcp_project_id: my-gns3-project-0042
# https://cloud.google.com/compute/docs/regions-zones
# `gcloud compute zones list`
gcp_zone: us-west1-b- The STORAGE section pertains to the persistent disk properties. The defaults provide us with 30 GB HDD storage, which may be sufficient for most use cases. These parameters also qualify for the GCP Free Tier .
You also have the option to increase the storage size and/or change the storage type to solid-state drive (SSD)
with the pd-ssd value. Additional charges will apply. See the Disk pricing
section of the Google Compute Engine Pricing
page. For example, the following creates a persistent disk with a size of 64 GB and type of SSD:
### STORAGE ###

gcp_disk_size: 64
gcp_disk_type: pd-ssd- In the COMPUTE section, the
gcp_vm_typedefines the machine type . The machine type we select comes down to the virtual device type(s) and the amount we plan to run within our VM instance. Again, use the Google Compute Engine Pricing page as a reference point.
The
n1-standard-2machine type should be adequate for labs consisting of 4 to 8 Cisco IOSv/IOSvL2 devices.
### COMPUTE ###

# https://cloud.google.com/compute/vm-instance-pricing
gcp_vm_type: n1-standard-2- Next up is the GNS3 section. The
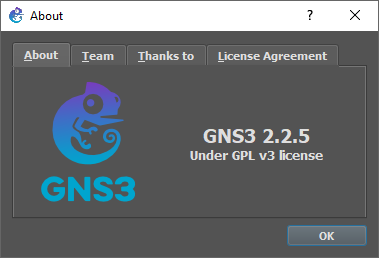
gns3_versionvariable value needs to match the GNS3 client version installed on your local computer.
### GNS3 ###

# https://github.com/GNS3/gns3-server/releases
gns3_version: 2.2.5- The Duck DNS variables take the values from the first step. For example, my domain is
binarynatureand my token isce2f4de5-3e0f-4149-8bcc-7a75466955d5. FYI, the token is no longer valid. 😉
### DUCKDNS ###

# https://www.duckdns.org
ddns_domain: binarynature
ddns_token: ce2f4de5-3e0f-4149-8bcc-7a75466955d5- Finally, let’s wrap this up with the WIREGUARD section. Remember when I stated you should take note of the public key value in the second step? This is where you enter it.
### WIREGUARD ###

wireguard_peer_pubkey: 1ciOzqdTvKu2hpJ89q4L3MgivQ+NtxWicf9xajbPQHc=
The vars.yml file is now complete. The Cloud Shell text editor should auto-save by default but press the ⌃ + s key combination just to be sure.
14. Create a Google Cloud service account and key file.
We need a method for authentication and authorization to the Google Cloud APIs for Ansible. The gcp_service_account_create.yml Ansible playbook execution performs the following operations:
- Adds a Google Cloud service account with the Cloud IAM Editor role.
- Creates the associated service account key file.
ansible-playbook gcp_service_account_create.yml
15. Provision Google Cloud resources and deploy the GNS3 server.
We’re now ready to provision our Google Cloud resources and deploy the GNS3 server.
ansible-playbook site.yml
16. Complete the client WireGuard configuration and establish the VPN connection.
With the conclusion of the deployment, we can retrieve the WireGuard public key from the peer to complete the WireGuard VPN configuration on our local computer.
- From the Cloud Shell terminal, copy the
public_keyvalue …
...
RUNNING HANDLER [wireguard : syncconf wireguard] *********************************************************************
changed: [35.199.187.220]

RUNNING HANDLER [gns3 : restart gns3] ********************************************************************************
changed: [35.199.187.220]

TASK [print wireguard public key] ************************************************************************************
ok: [35.199.187.220] => {
    "public_key": "VknjKPWU3mJK6HlippeJ/LaeOH0uHOoA/lTCwzrKbTo="
}

PLAY RECAP ***********************************************************************************************************
35.199.187.220             : ok=78   changed=68   unreachable=0    failed=0    skipped=3    rescued=0    ignored=0
localhost                  : ok=7    changed=3    unreachable=0    failed=0    skipped=1    rescued=0    ignored=0

Playbook run took 0 days, 0 hours, 6 minutes, 14 seconds
and paste it as the value for the PublicKey variable.
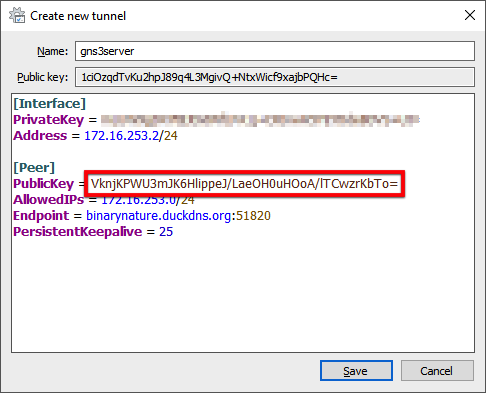
- Click the Save button.
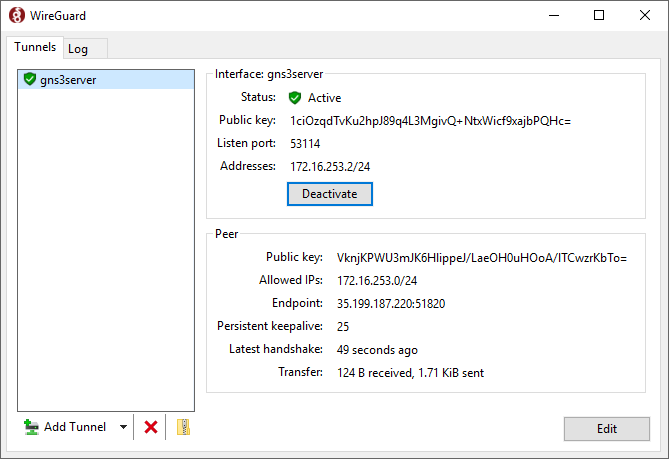
- At the WireGuard Tunnels list window, click the Activate button to establish the connection.
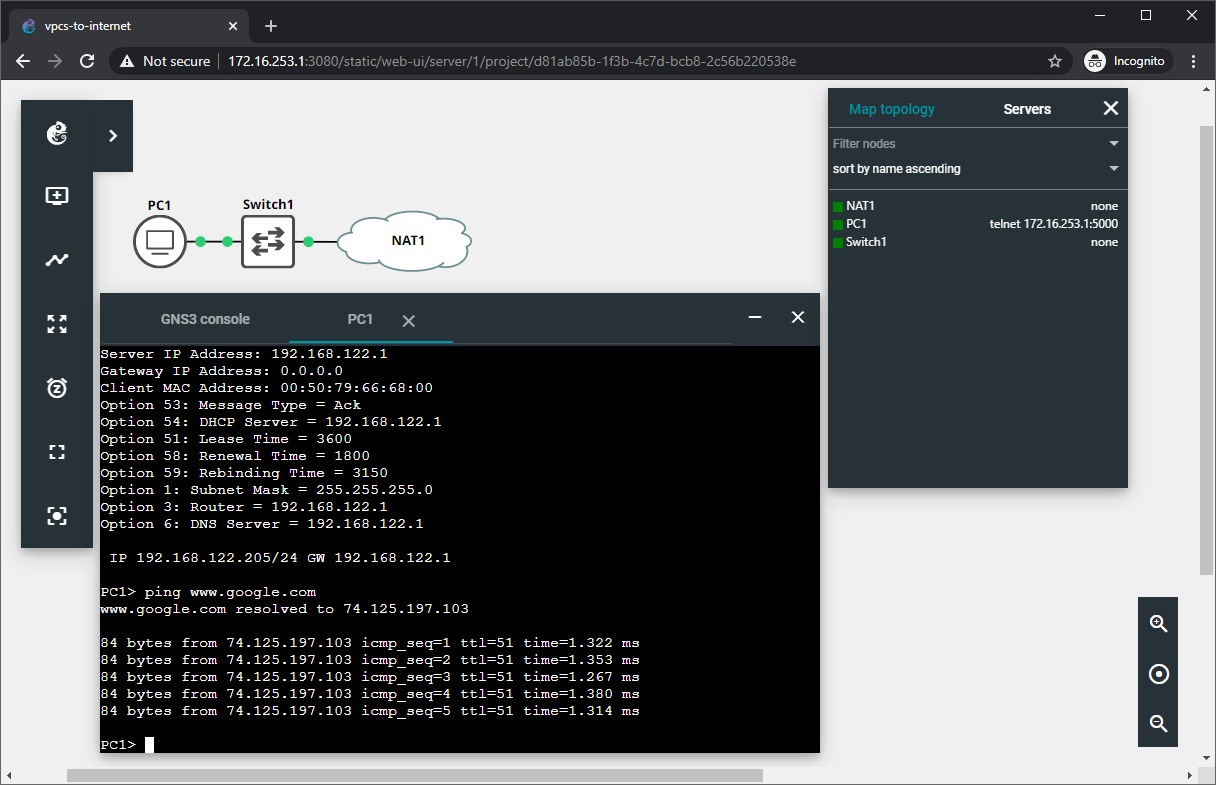
17. Connect to the remote GNS3 server with the GNS3 Web UI.
- Open a supported web browser on your local computer.
- Enter
http://172.16.253.1:3080into the address bar.
18. Attach the local GNS3 client to the remote GNS3 server.
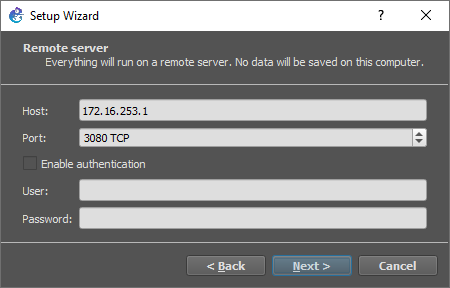
- Open the GNS3 client application.
- In the Setup Wizard window, select Run appliances on a remote server (advanced usage) for server type.
- Click the Next button.
- Enter the following values for the Host and Port properties:
- Host:
172.16.253.1 - Port:
3080 TCP
- Host:
- Click the Next button.
- Click the Finish button.
19. All set.
Refer to the following resources to help you further configure GNS3:
- GNS3 Documentation
- GNS3 Fundamentals (Official Course): Part 1
- GNS3 Fundamentals (Official Course): Part 2
- Store and retrieve GNS3 images with Google Cloud Storage
GNS3 with Remote Server Workflow
1. Start the VM instance with one of the following:
- The Google Cloud Shell (or if Google Cloud SDK installed locally):
gcloud compute instances list
output:
NAME        ZONE        MACHINE_TYPE   PREEMPTIBLE  INTERNAL_IP  EXTERNAL_IP  STATUS
gns3server  us-west1-b  n1-standard-2               10.138.0.2                TERMINATED
gcloud compute instances start gns3server --zone us-west1-b --quiet
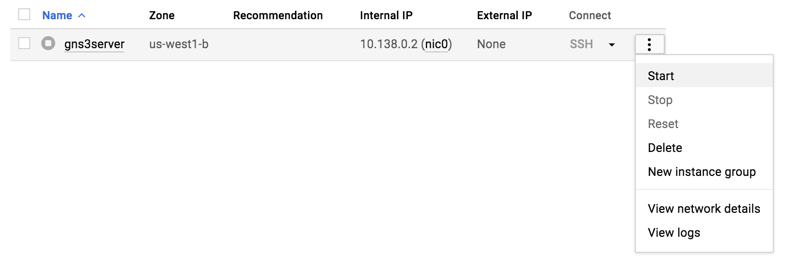
- The Google Cloud Console :
- The Google Cloud mobile app
2. Activate the WireGuard VPN session.
3. Open the GNS3 client application.
4. Start the node(s) within GNS3.
5. Happy Labbing!
6. Save the configuration at the node-level (e.g., copy run start, commit, etc.).
7. Stop the node(s) within GNS3.
8. Exit the GNS3 client application.
9. Deactivate the WireGuard VPN session.
10. Stop the VM instance with one of the following:
- The Google Cloud Shell (or if Google Cloud SDK installed locally):
gcloud compute instances list
output:
NAME        ZONE        MACHINE_TYPE   PREEMPTIBLE  INTERNAL_IP  EXTERNAL_IP     STATUS
gns3server  us-west1-b  n1-standard-2               10.138.0.2   35.199.147.244  RUNNING
gcloud compute instances stop gns3server --zone us-west1-b --quiet
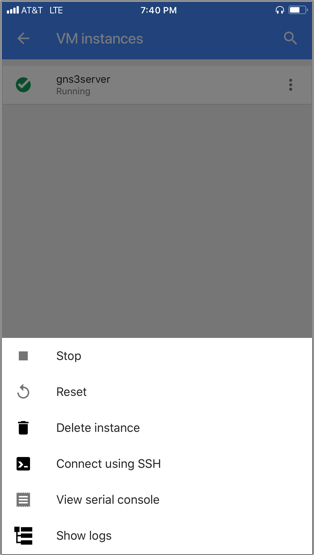
The Google Cloud mobile app
How Do I?
Update GNS3 server to the latest version
GNS3 just released a new version. We took the first step of downloading and installing the updated GNS3 client on our local computer, but we also have an existing GNS3 server VM instance in Google Cloud. We’d rather not resort to deleting and redeploying the VM instance for a simple upgrade. What’s the most straightforward solution?
- Modify the
gns3_versionvariable value in thevars.ymlfile.
### GNS3 ###

# https://github.com/GNS3/gns3-server/releases
gns3_version: 2.2.8- Rerun the Ansible playbook.
ansible-playbook site.yml
Delete the Google Cloud resources
The gcp_resources_delete.yml Ansible playbook deletes the Google Cloud resources associated with the deployment. Make sure to copy any pertinent data (e.g., GNS3 projects, device configs, etc.) from the VM instance’s storage before performing this operation.
ansible-playbook gcp_resources_delete.yml