
Continuing my journey to Vagrantize more virtual network appliances…
Ingredients used in this guide:
The FortiGate VM includes a limited embedded 15-day trial license that supports:
- 1 CPU maximum
- 1 GB RAM maximum
- Low encryption only (no HTTPS administrative access)
- All features except FortiGuard updates
Steps
1. Download and unzip the FortiGate VM deployment package for VMware.
FortiGate VM deployment packages are included with FortiGate firmware images on the Customer Service & Support site. I will be using FortiGate VM v6.0.2 for my example.
- Save the
FGT_VM64-v6-build0163-FORTINET.out.ovf.zipfile to the Downloads folder - Double-click the
FGT_VM64-v6-build0163-FORTINET.out.ovf.zipfile to unzip it - Rename the
FGT_VM64-v6-build0163-FORTINET.out.ovffolder toFGT_VM64-v6
2. Create the FortiGate VM template.
- Open the VMware Fusion application
- Menu: File → Import…
- Click the Choose File… button
- Navigate to and select the
FortiGate-VM64.ovffile in the FGT_VM64-v6 folder - Click the Open button
- Click the Continue button
- Click the Accept button for the EULA
- Save As: FortiGate-VM64
- Click the Save button
- Click the Customize Settings button to modify the virtual appliance settings
- Set Network Adapter to Share with my Mac
- Upgrade the VM hardware version to 16 (Compatibility → Upgrade)
- Close the Settings window
- Quit the VMware Fusion application
3. Remove additional network interfaces from the virtual appliance configuration file.
From a macOS terminal, remove Network Adapter 2 to Network Adapter 10.
sed -i '' '/^ethernet[^0]/d' $HOME/Virtual\ Machines.localized/FortiGate-VM64.vmwarevm/FortiGate-VM64.vmx
The default virtual machine folder (directory) for VMware Fusion 11 is
$HOME/Virtual\ Machines.localized. Upgrades and earlier versions use$HOME/Documents/Virtual\ Machines.localizedas the default.
Verify only Network Adapter remains.
grep '^ethernet' $HOME/Virtual\ Machines.localized/FortiGate-VM64.vmwarevm/FortiGate-VM64.vmx
output:
ethernet0.present = "TRUE"
ethernet0.virtualDev = "e1000"
ethernet0.connectionType = "nat"
ethernet0.addressType = "generated"
ethernet0.wakeonpcktrcv = "true"
ethernet0.allowguestconnectioncontrol = "true"
4. Add a custom serial port (for management via console connection).
From a macOS terminal, append a serial port device to the virtual appliance configuration file.
printf 'serial0.present = "TRUE"\nserial0.yieldOnMsrRead = "TRUE"\nserial0.fileType = "network"\nserial0.fileName = "telnet://127.0.0.1:52099"\n' >> $HOME/Virtual\ Machines.localized/FortiGate-VM64.vmwarevm/FortiGate-VM64.vmx
Verify the component has been added.
tail -4 $HOME/Virtual\ Machines.localized/FortiGate-VM64.vmwarevm/FortiGate-VM64.vmx
output:
serial0.present = "TRUE"
serial0.yieldOnMsrRead = "TRUE"
serial0.fileType = "network"
serial0.fileName = "telnet://127.0.0.1:52099"
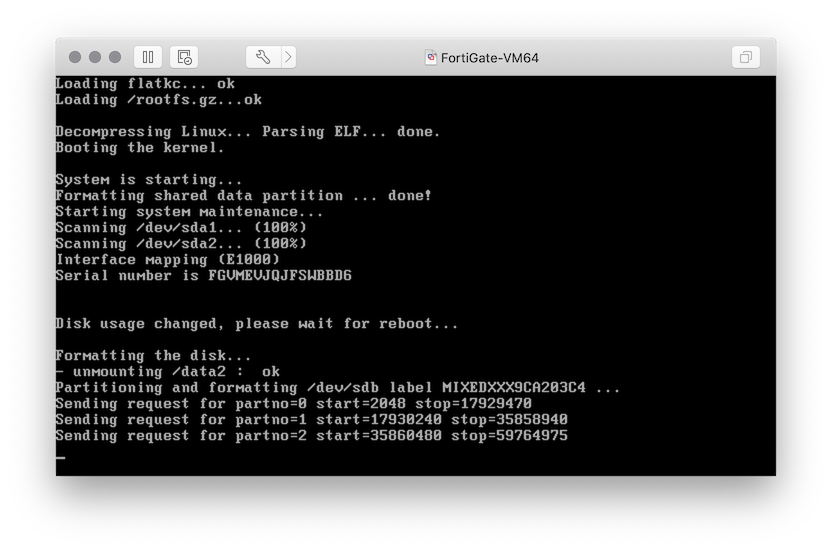
5. Start the virtual applicance.
From a macOS terminal, start the virtual appliance with the vmrun command.
/Applications/VMware\ Fusion.app/Contents/Library/vmrun start $HOME/Virtual\ Machines.localized/FortiGate-VM64.vmwarevm/FortiGate-VM64.vmx
An automatic reboot will be performed after initialization.
6. Log in to the FortiGate device.
Log in via the VMware console as admin with no password.
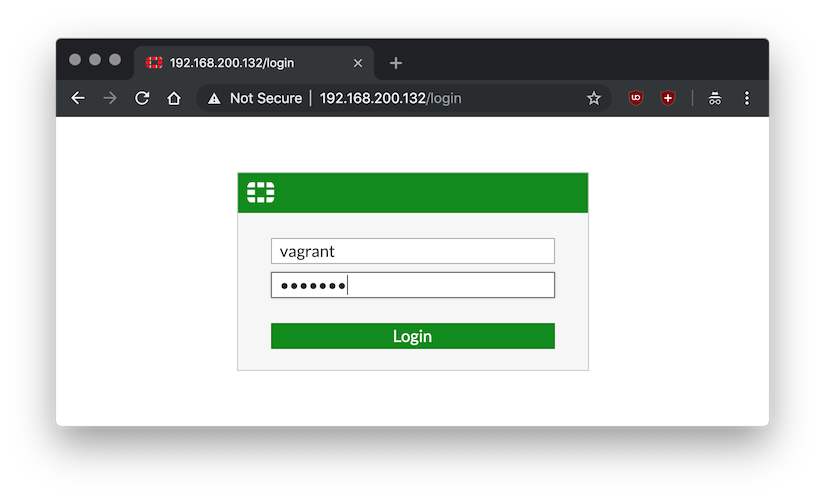
7. Get the management network interface (port1) IPv4 address.
get system interface physical
output:
== [onboard]
    ==[port1]
        mode: dhcp
        ip: 192.168.200.132 255.255.255.0
        ipv6: ::/0
        status: up
        speed: 1000Mbps (Duplex: full)
Log out.
exit
8. Connect via SSH.
From a macOS terminal, log in via SSH to the FortiGate device.
ssh [email protected]
9. Set a baseline configuration for the Vagrant box.
Create the vagrant user with the super_admin access profile.
config system admin
edit vagrant
set accprofile super_admin
set password vagrant
set ssh-public-key1 "ssh-rsa AAAAB3NzaC1yc2EAAAABIwAAAQEA6NF8iallvQVp22WDkTkyrtvp9eWW6A8YVr+kz4TjGYe7gHzIw+niNltGEFHzD8+v1I2YJ6oXevct1YeS0o9HZyN1Q9qgCgzUFtdOKLv6IedplqoPkcmF0aYet2PkEDo3MlTBckFXPITAMzF8dJSIFo9D8HfdOV0IAdx4O7PtixWKn5y2hMNG0zQPyUecp4pzC6kivAIhyfHilFR61RGL+GPXQ2MWZWFYbAGjyiYJnAmCP3NOTd0jMZEnDkbUvxhMmBYSdETk1rRgm+R4LOzFUGaHqHDLKLX+FIPKcF96hrucXzcWyLbIbEgE98OHlnVYCzRdK8jlqm8tehUc9c9WhQ=="
end
Verify the configuration for the vagrant user.
show system admin vagrant
output:
config system admin
    edit "vagrant"
        set accprofile "super_admin"
        set vdom "root"
        set ssh-public-key1 "ssh-rsa AAAAB3NzaC1yc2EAAAABIwAAAQEA6NF8iallvQVp22WDkTkyrtvp9eWW6A8YVr+kz4TjGYe7gHzIw+niNltGEFHzD8+v1I2YJ6oXevct1YeS0o9HZyN1Q9qgCgzUFtdOKLv6IedplqoPkcmF0aYet2PkEDo3MlTBckFXPITAMzF8dJSIFo9D8HfdOV0IAdx4O7PtixWKn5y2hMNG0zQPyUecp4pzC6kivAIhyfHilFR61RGL+GPXQ2MWZWFYbAGjyiYJnAmCP3NOTd0jMZEnDkbUvxhMmBYSdETk1rRgm+R4LOzFUGaHqHDLKLX+FIPKcF96hrucXzcWyLbIbEgE98OHlnVYCzRdK8jlqm8tehUc9c9WhQ=="
        set password ENC SH28ytlJGDAGlEQ6Oo7Z0BNTLVuqBIf7yLQWuuaBln/BsRSTbJTvAYZrXgq1OY=
    next
end
Set idle timeout to one hour.
config system global
set admintimeout 60
set admin-ssh-grace-time 3600
end
Verify the idle timeout configuration.
show system global | grep -f admin
output:
config system global
    set admin-ssh-grace-time 3600 <---
    set admintimeout 60 <---
    set alias "FortiGate-VM64"
    set hostname "FortiGate-VM64"
    set timezone 04
end
We should also verify the management network interface (port1) allows web UI access. It should be enabled by default.
show system interface port1
output:
config system interface
    edit "port1"
        set vdom "root"
        set mode dhcp
        set allowaccess ping https ssh http fgfm
        set type physical
        set snmp-index 1
    next
end
Exit the SSH session.
exit
10. Stop the virtual appliance and quit the VMware Fusion application.
From a macOS terminal, stop the virtual appliance with the vmrun command.
/Applications/VMware\ Fusion.app/Contents/Library/vmrun stop $HOME/Virtual\ Machines.localized/FortiGate-VM64.vmwarevm/FortiGate-VM64.vmx
11. Create the Vagrant box.
From a macOS terminal, change the current directory.
cd $HOME/Virtual\ Machines.localized/FortiGate-VM64.vmwarevm
Remove generated MAC addresses from the configuration file.
sed -i '' '/generatedAddress/d' FortiGate-VM64.vmx
Remove UUID properties from the configuration file.
sed -i '' '/uuid/d' FortiGate-VM64.vmx
Create the metadata.json file for the VMware provider.
printf '{"provider": "vmware_desktop"}' > metadata.json
List the directory contents to verify the essential files are present.
du -csh *
output:
102M    FortiGate-VM64-disk1.vmdk
 53M    FortiGate-VM64-disk2.vmdk
4.0K    FortiGate-VM64.plist
  0B    FortiGate-VM64.vmsd
4.0K    FortiGate-VM64.vmx
4.0K    FortiGate-VM64.vmxf
4.0K    metadata.json
 12K    nvram
4.0K    startMenu.plist
340K    vmware.log
155M    total
Package the Vagrant box file with tar.
tar cvzf fortigate-602.box ./*
12. Add the Vagrant box.
From a macOS terminal, add the Vagrant box to our local inventory.
vagrant box add --provider vmware_desktop --name fortigate-602 fortigate-602.box
13. Test it.
From a macOS terminal, create a directory for a test project and change to it.
mkdir $HOME/Documents/test-fortigate && cd $_
Download an example Vagrantfile.
$ curl -Lo Vagrantfile https://raw.githubusercontent.com/mweisel/vagrant-vmware-examples/master/fortigate-single-mgmt-int
Validate the Vagrantfile.
vagrant validate
Show the current status of the vagrant machine.
vagrant status
14. Vagrant Up!
vagrant up
The status of the vagrant machine should now be in the running state.
vagrant status
We can connect to the vagrant machine with SSH.
vagrant ssh
We can also connect to the vagrant machine with a console connection (out-of-band management) via Netcat.
nc -c 127.0.0.1 52001
Or the web UI via HTTP.
15. More Vagrant commands
Stop the vagrant machine with the force option.
vagrant halt -f
Destroy (delete) the vagrant machine with the force option.
vagrant destroy -f