The content in this post is intended for educational and informational purposes only. All software rights belong to their respective owners.
The Cisco IOSv and IOSv L2 devices could be considered the standard for learning Cisco routing and switching in the confines of a virtual network environment. They’re light in resource usage and contain a vast feature set.
Prerequisites
- Cisco Modeling Labs subscription
- GNS3 with macOS on Apple Silicon
macOS
-
Point your web browser to the CML Software Download page.
-
Click the Download icon for Cisco Modeling Labs reference platform ISO file (February 2024).

-
Log in with your Cisco.com (CCO ID) credentials when prompted.
-
Save the
refplat-20240225-fcs-iso.zipfile to your Downloads folder. -
Open your favorite terminal emulator, and change to the
Downloadsdirectory.
cd ~/Downloads
- Create the
cml27-refplatdirectory.
mkdir -p cml27-refplat
- Uncompress the
refplat-20240225-fcs-iso.zipfile into thecml27-refplatdirectory.
unzip refplat-20240225-fcs-iso.zip -d cml27-refplat
- Attach the
refplat-20240225-fcs.isofile.
open cml27-refplat/refplat-20240225-fcs.iso
- Create the
QEMUdirectory.
mkdir -p ~/GNS3/images/QEMU
- Copy the IOSv L2 image to the
QEMUdirectory.
cp /Volumes/REFPLAT/virl-base-images/iosvl2-2020/vios_l2-adventerprisek9-m.ssa.high_iron_20200929.qcow2 ~/GNS3/images/QEMU
- Copy the IOSv image to the
QEMUdirectory.
cp /Volumes/REFPLAT/virl-base-images/iosv-159-3-m8/vios-adventerprisek9-m.spa.159-3.m8.qcow2 ~/GNS3/images/QEMU
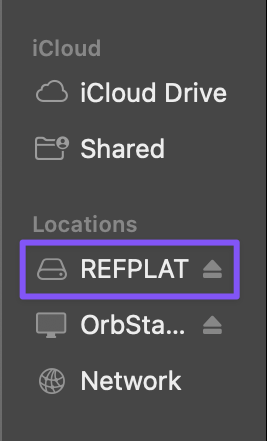
- Detach the REFPLAT image file from Finder.
GNS3
-
Open the GNS3 client application.
-
Click the Cancel button to close the Project window.
IOSv L2
-
Menu: File → New template
-
Select Install an appliance from the GNS3 server (recommended).
-
Click the Next button.
-
Click the Update from online registry button.
-
Enter
iosvin the Filter field. -
Select Cisco IOSvL2.
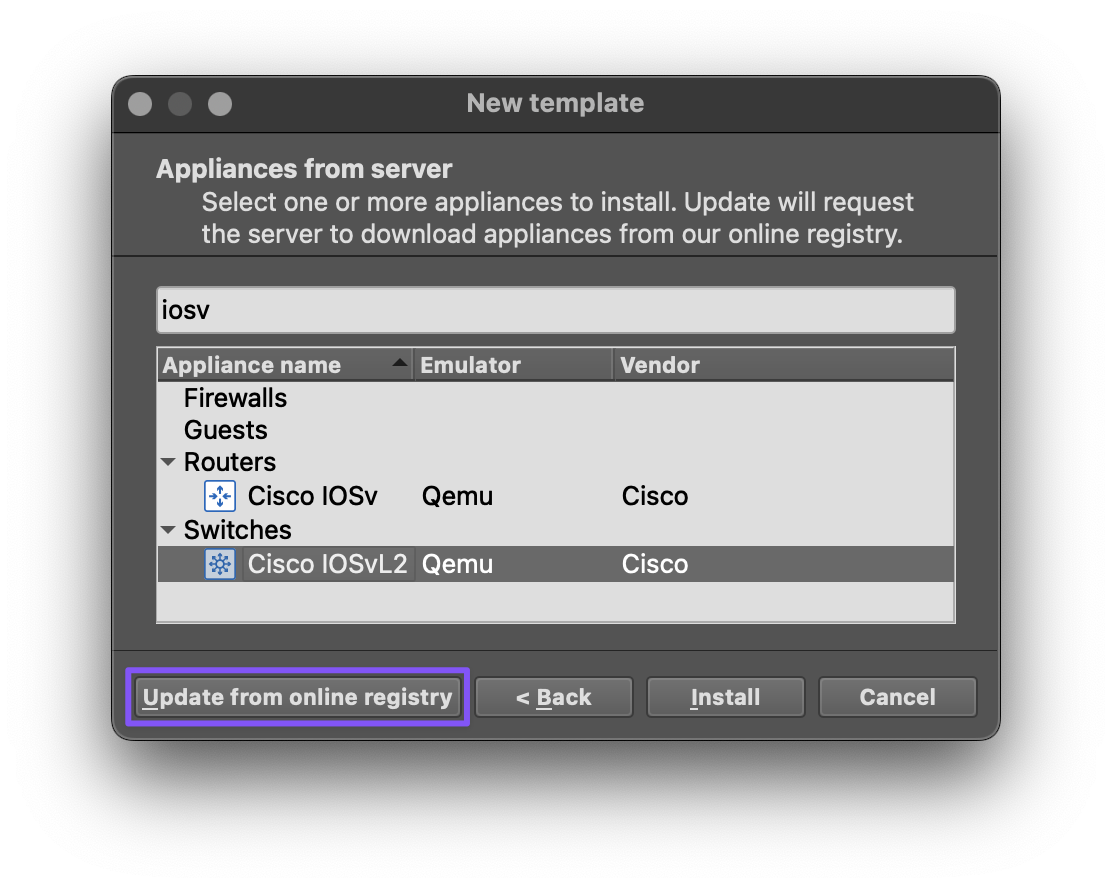
-
Click the Install button.
-
Click the Next button.
-
Select
/usr/bin/qemu-system-x86_64for the QEMU binary value. -
Click the Next button.
-
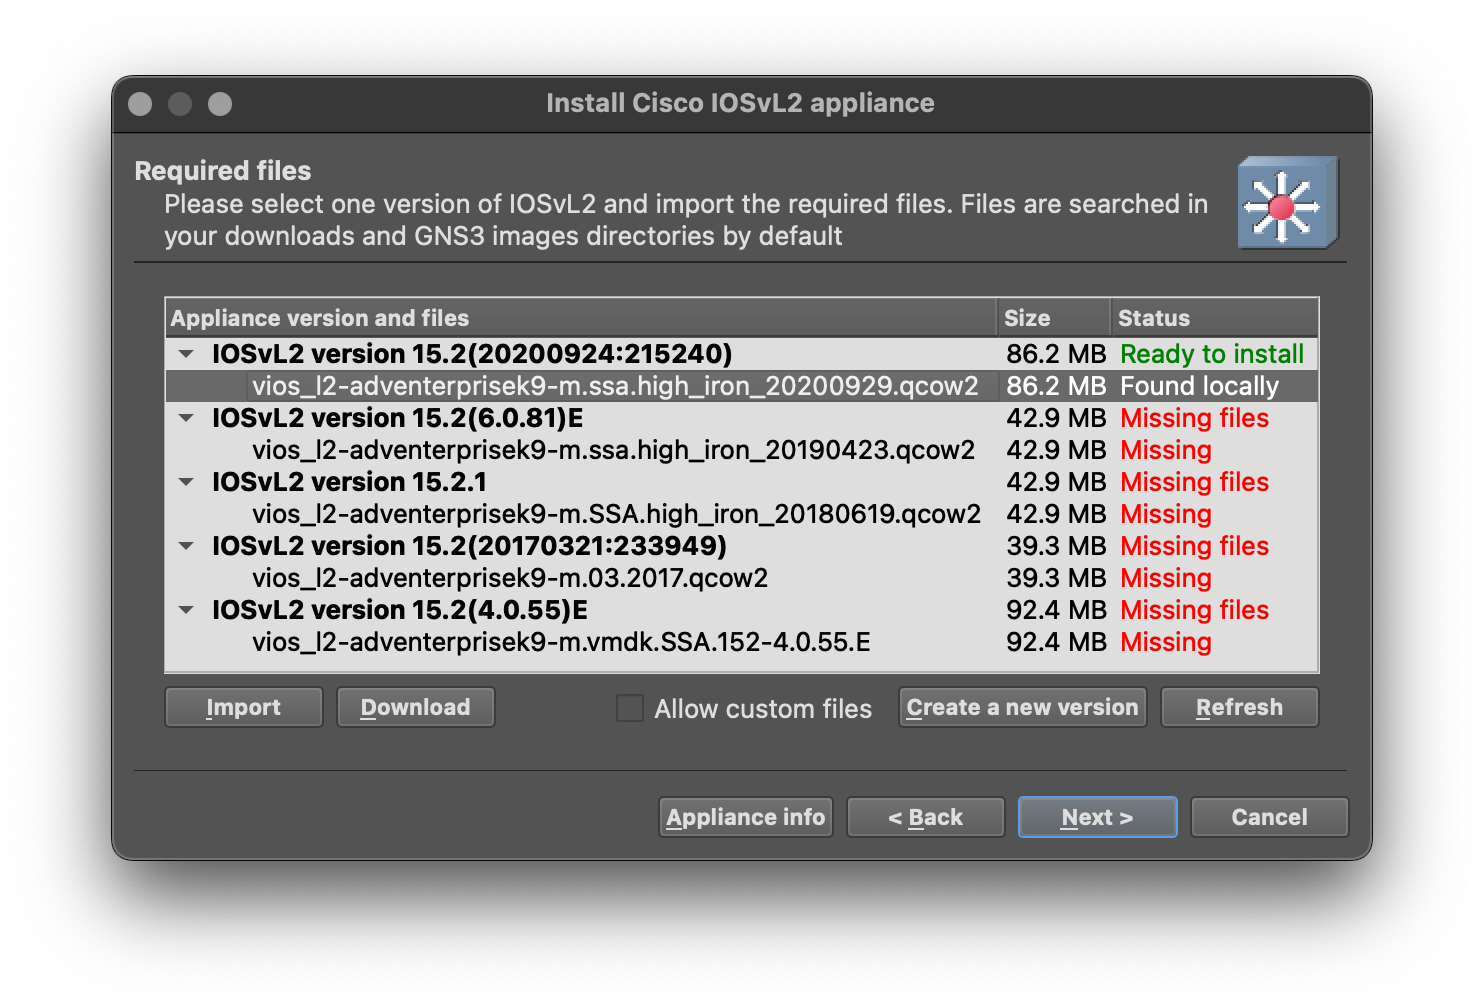
Select the
vios_l2-adventerprisek9-m.ssa.high_iron_20200929.qcow2entry.
The IOSv L2 image file should be detected automatically from the ~/GNS3/images/QEMU directory.
-
Click the Next button.
-
Click the Yes button when prompted to install.
-
Click the Finish button.
-
Click the OK button.
-
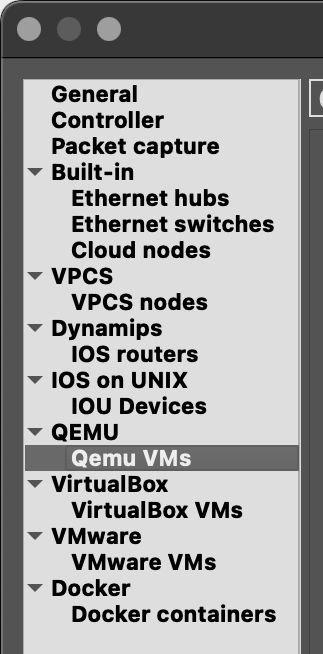
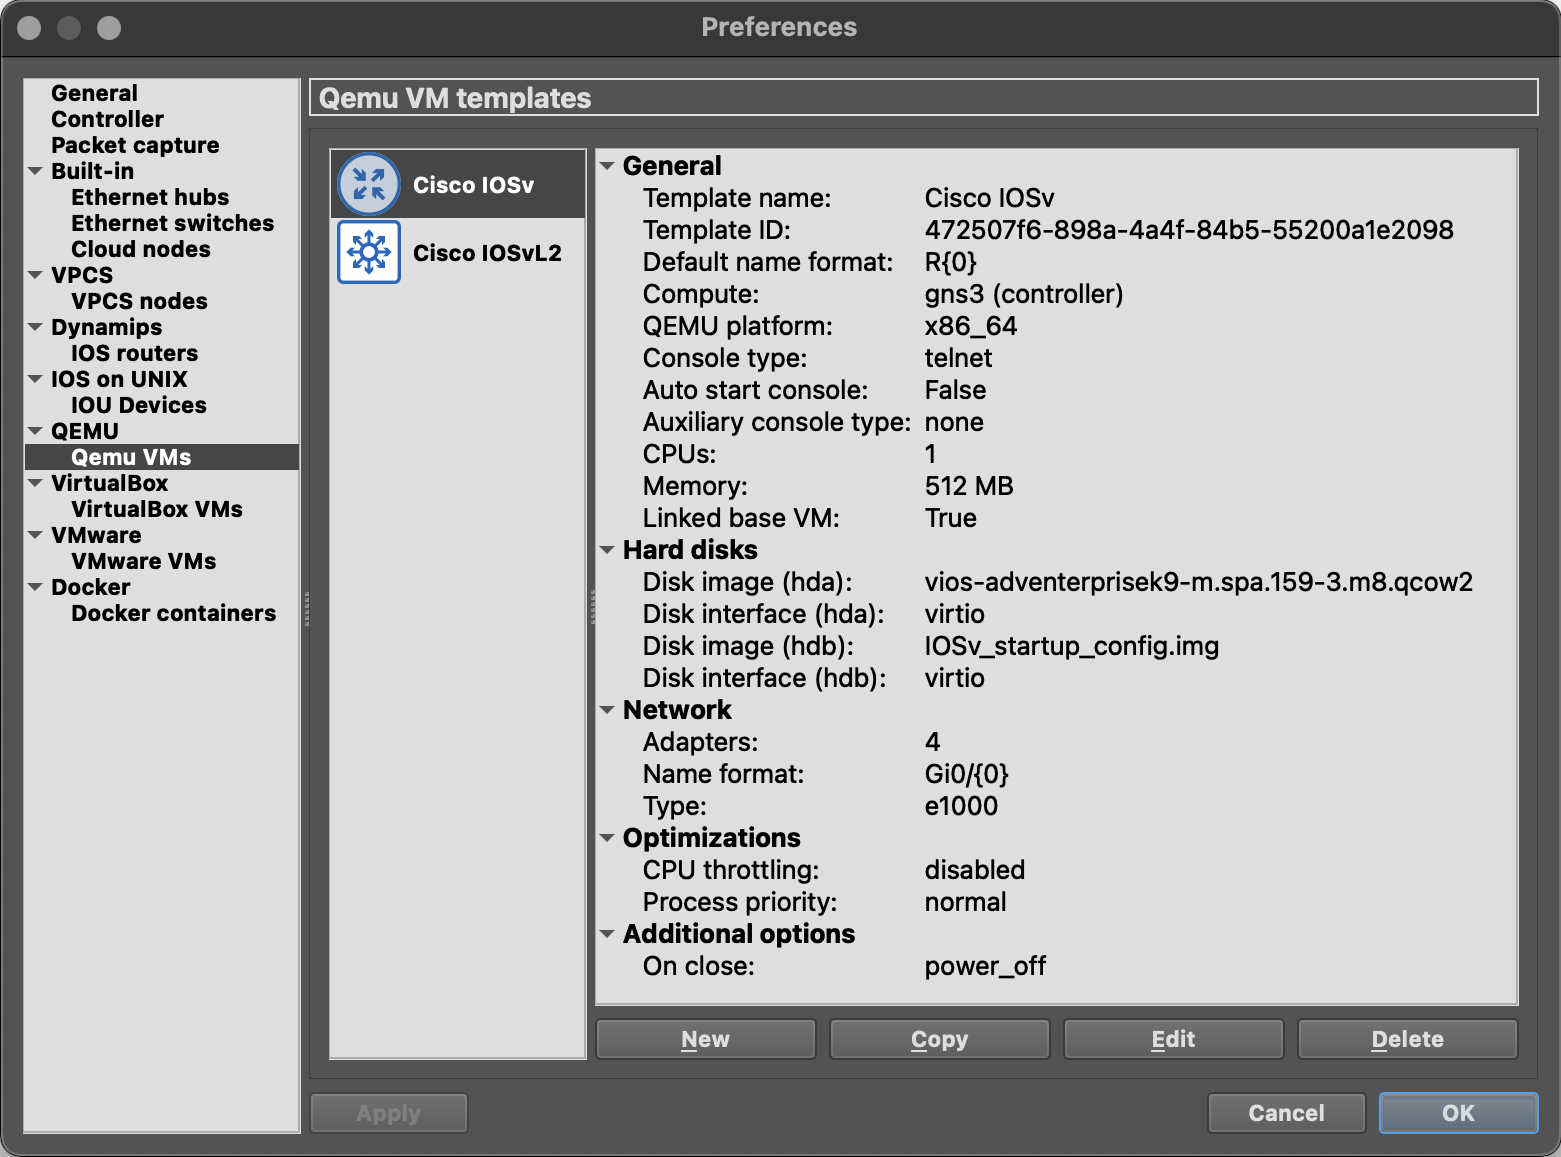
Press the ⌘ + , key combo to open the GNS3 Preferences.
-
Select Qemu VMs on the left side menu.
-
Click the Edit button for the Cisco IOSvL2 template.
-
Enter
SW{0}for the Default name format value. -
Enter
:/symbols/affinity/square/blue/switch_multilayer.svgfor the Symbol value.
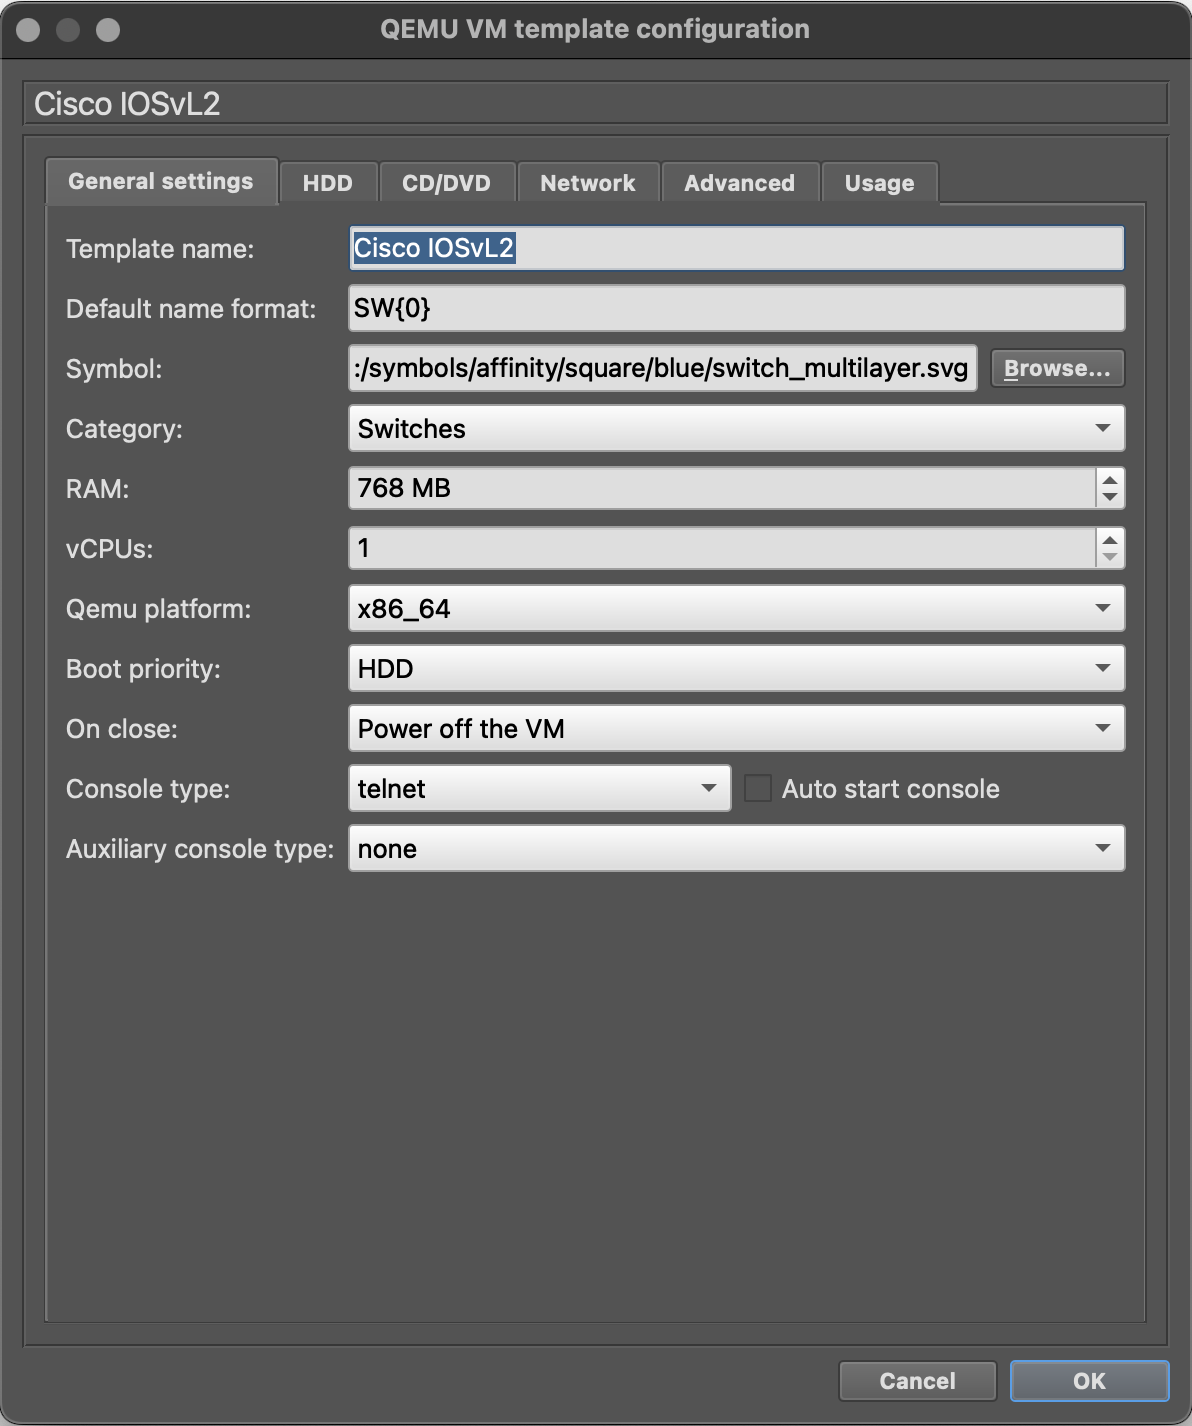
-
Click the OK button.
-
Click the Apply button to save the template.
-
Click the OK button to close the GNS3 Preferences window.
IOSv
-
Menu: File → New template
-
Select Install an appliance from the GNS3 server (recommended).
-
Click the Next button.
-
Enter
iosvin the Filter field. -
Select Cisco IOSv.
-
Click the Install button.
-
Click the Next button.
-
Select
/usr/bin/qemu-system-x86_64for the QEMU binary value. -
Click the Next button.
-
Select the
IOSv_startup_config.imgentry.
The IOSv image file should be detected automatically from the ~/GNS3/images/QEMU directory, but the IOSv_startup_config.img file will need to be downloaded.
- Click the Download button.
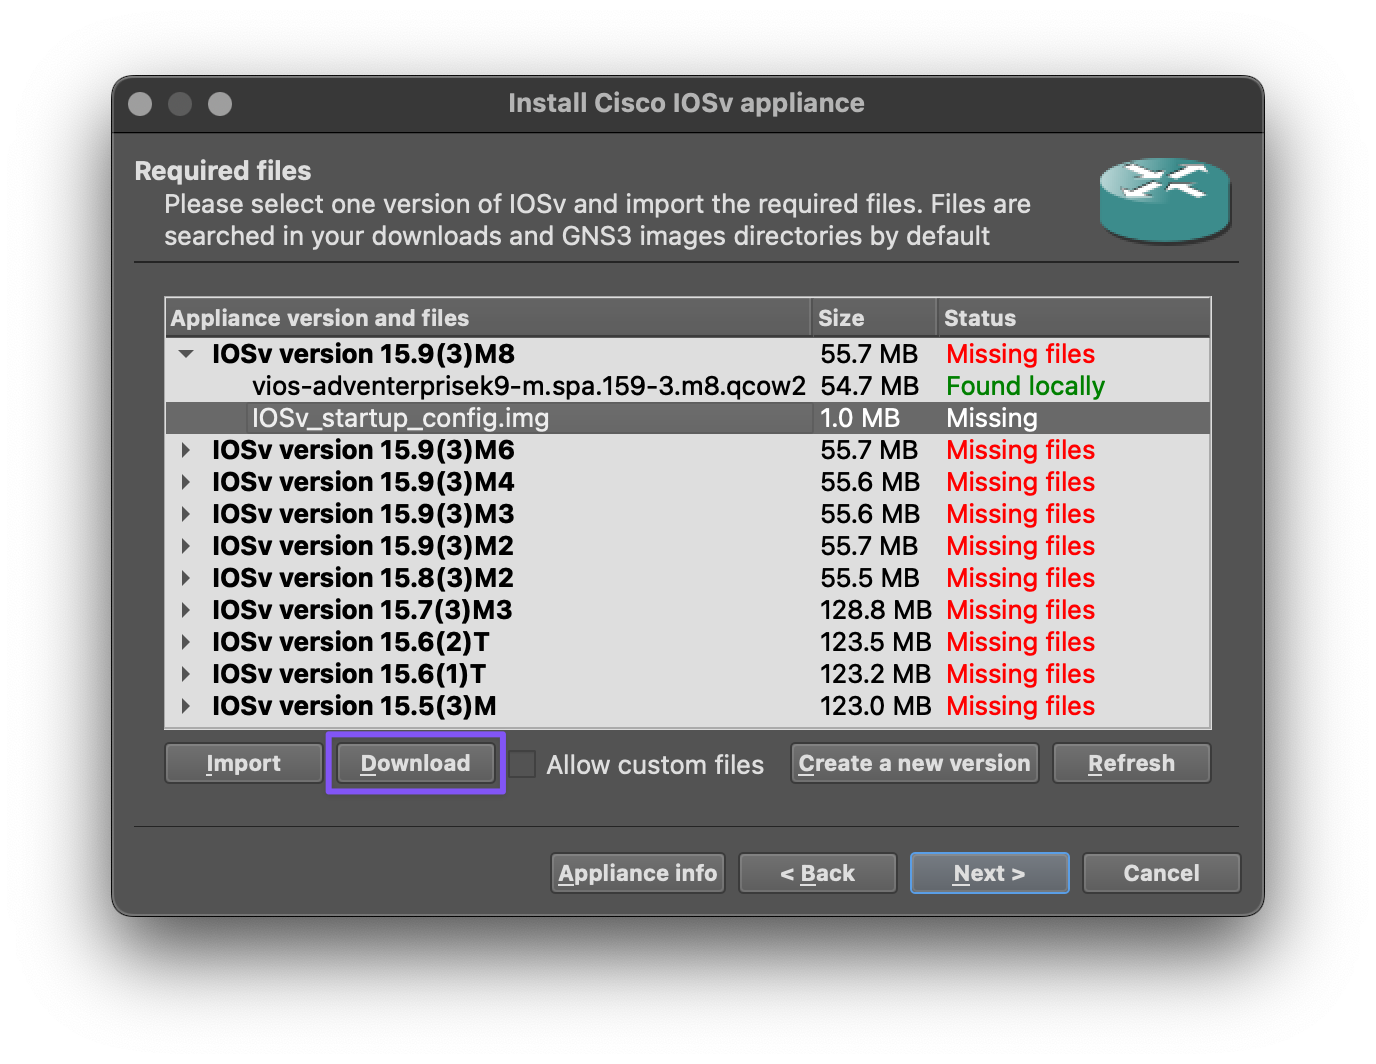
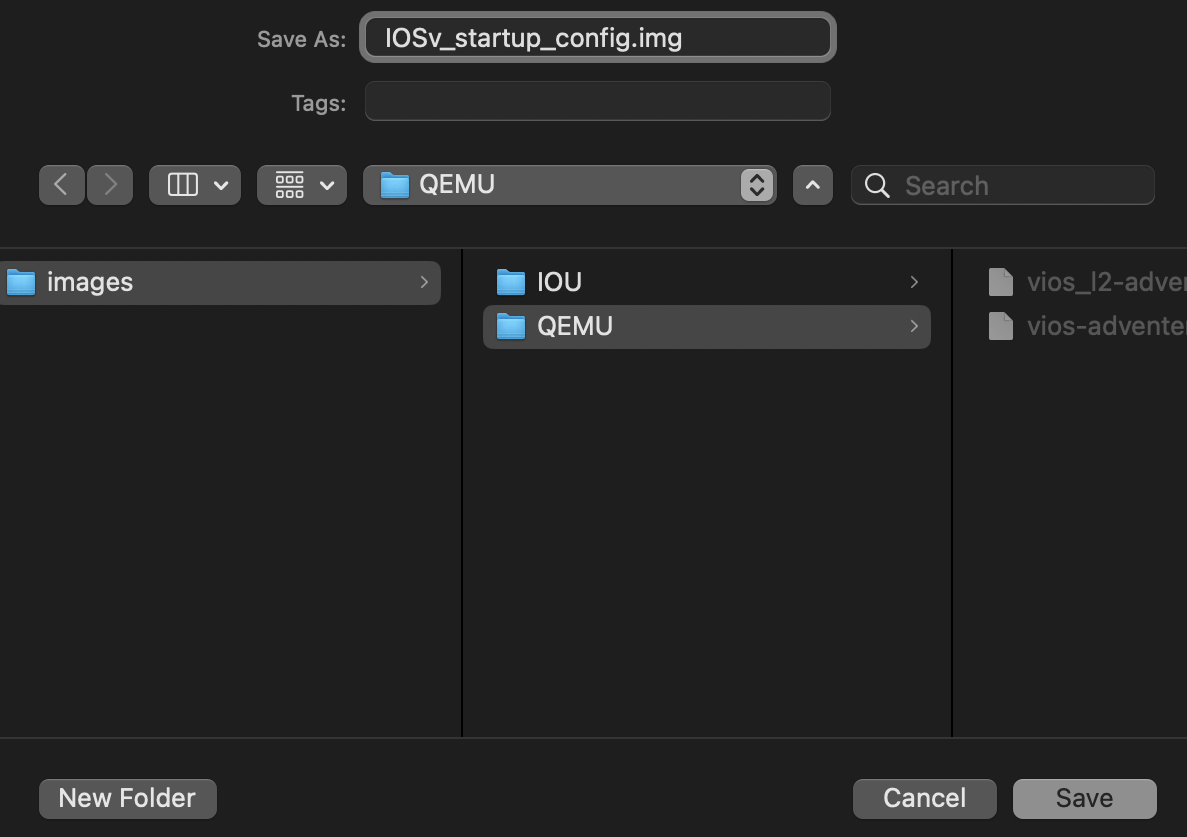
- Save the
IOSv_startup_config.imgfile to the~/GNS3/images/QEMUfolder.
- Click the Refresh button.
The IOSv_startup_config.img file should now be detected.
-
Select the IOSv version 15.9(3)M8 entry.
-
Click the Next button.
-
Click the Yes button when prompted to install.
-
Click the Finish button.
-
Click the OK button.
-
Press the ⌘ + , key combo to open the GNS3 Preferences.
-
Select QEMU VMs on the left side menu.
-
Click the Edit button for the Cisco IOSv template.
-
Enter
R{0}for the Default name format value. -
Enter
:/symbols/affinity/circle/blue/router2.svgfor the Symbol value. -
Click the OK button.
-
Click the Apply button to save the template.
- Click the OK button to close the GNS3 Preferences window.